We moved into our home in March of 2009. It was still cold and needless to say there wasn't much growth on the trees or bushes. The entrance to the subdivision looked kind of like the entrance to a state park. I was certain that would change once spring was here. I was confident there would be a spring cleanup and flowers would be blooming and it would be amazing.
W R O N G!
It turns out that this particular entrance to our subdivision has been neglected for years. There were actually many good reasons it was neglected as the HOA had to deal with many issues with the township. (I mean... it probably didn't need to take as long as it did, but whatevs)
Of course I don't have a good "before" picture, but I was able to pull an old shot off of google maps. This pic shows how ugly it was but it doesn’t truly depict how over grown everything was before it was redone.
I did manage to get a shot of the state park looking sign.
BIG Mistake! BIG BIG Mistake!
The grounds were littered with garbage, bottles, and doggie waste bags. And the ground was so hard it was like digging into cement. To make matters worse, once I finally got everything cleaned up and planted, I found out there was no functioning water source. UGH!!! So I had to lug water from my house to keep the mums alive. The finished product looked better when I was done, but it was still mediocre at best.
Below are pictures taken before the mums were in full bloom.
Below are pictures taken before the mums were in full bloom.
As I mentioned above, there were some good reasons why the entrance had not been addressed. Some that had to do with the neighborhood, but most had to do with limitations from the township.
I could make a long story longer, but I won't get into all of the details. Basically the major challenges were:
• The sign had to be easily removed if necessary and the distance to the road was important so that meant we could not build a permanent structure and current sign could not be moved from its current location.
• The size of the island and the distance to the road meant no sign in the island.
• Property owned by the hospital meant no landscaping on the right side of the entrance
Although there were several things going against a proper entrance, I knew we could still make it nice so I pitched an idea to the HOA. All of my suggestions took the above challenges into consideration. I suggested we paint the existing sign and build columns out of stack-able stones on each side. This way they could be easily removed should the township need to access the pipes and other things located under the sign.
I also pitched landscaping ideas. My original pitch included full color pictures that I literally cut and pasted together to provide a visual. Admittedly, I had some grand plans originally. My plan included a million more flats of annual flowers, but planting that amount of flats every year comes at a cost. All 4 entrances have to be evenly and fairly maintained.
Another priority was to select trees that would help conceal the yard of the home behind the entrance.
The president of the HOA was able to work with the township and they agreed to let us paint the sign and add removable stone columns. HUGE WIN! Of course there was a small catch. We could not move the sign from its current location. UGH! But OK, we can work with that.
The HOA let me pick materials and select plantings for the entrance and I loved every second of the process!
Then, the HOA took a leap of faith and let me paint the sign!!! They don't really know me. They don't know what I am capable of doing. But they trusted me! I mean... I was cheap. I only charged the cost of supplies, so how could they pass up that deal?
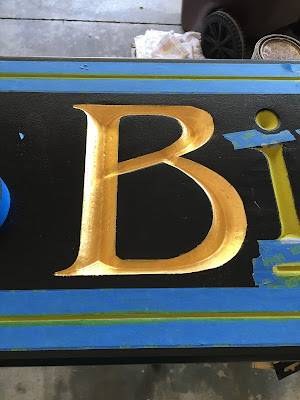
I wanted to gold leaf the letters and paint the sign black. I was prepared for the time-consuming task of gold leafing, but then I ran into my neighbor Lou who said, "ya know they make liquid gold leaf". WHAT??? They do??? Once I found that out, liquid gold leaf it was! And it turns out it is so much more affordable and easier to apply.
Check out this beauty!
I started by scraping the loose paint, filling cracks with wood filler and a lot of sanding. I painted the letters a base of yellow paint before the gold leaf paint.
After getting everything taped and painted, I finished it with what seemed like a million coats of water-based polyurethane.
After the sign was done the landscapers built the columns, placed the sign and planted. It was fall of 2016 and although it looked nice, it wasn't until this year that I appreciated how beautiful it really is! The flowers are in full bloom and I am so happy every time I turn into into my sub. There were a ton reasons why this shouldn't have ended up as nice as it did, but it is beautiful! I can only imagine how beautiful it will be when all of the plants mature.
BTW... I do not claim to be a photographer! LOL
If you enjoyed this article, get email updates by entering your email address in the "follow by email box" located in the right side pane of the full website version.
Viewing this article on a cell phone? Please go to the web version to enter your email address to follow.


